Warhammer 40k – Compilation

Warhammer 40k Compilation

This gent arrived in the post a little while ago. I had it back when 1st edition was the only edition, but sold it when I got 2nd. It’s great to have it back in my life! It’s really taken me back to the early 90s!

Published in 1991, making this 30 years old, it’s in incredible condition. And I managed to get it for a third of the price they usually go for! Feeling smug.

Firstly, there’s the cover – a bright yellow background and the vibrant red of the Blood Angels, who are heroically cutting down hordes of genestealers. A hint of what’s to be found inside.

Much like the Warhammer Compendium (published two years earlier), the Compilation is basically just a collection of White Dwarf articles with new rules, army lists and background for various factions. This one focuses on Space Marines, Grey Knights and other Terminators, Imperial Guard, Eldar and Genestealers.

Warhammer 40k Compilation

It starts with the Grey Knights. Just a couple of pages and two units – the captain and the terminator squad. The Knights have come a long was since then! There’s more terminator stuff though, with rules for the Cyclone Missile Launcher, Thunder Hammers, Storm Shields and Lightning Claws and a page on ‘Traitor Terminators’.

Things have changed a lot. If the CML model is hit by enemy fire roll 2D6 and if the result is 11 or 12 there’s a catastrophic launch! This could result in the terminator exploding or him spinning around firing off missiles randomly. So you don’t need to wound him, or get through his armour, just pepper him with lasgun shots until he gets 11 or 12 then watch the fireworks!

The Thunder Hammer can be cranked up to full power and instead of D6 damage, it has D6xD6 damage. It’s destroyed and hits the wielder with D6 damage in the process, so it’s a suicide hit, but one with the potential for doing 36 damage!!

Warhammer 40k Compilation

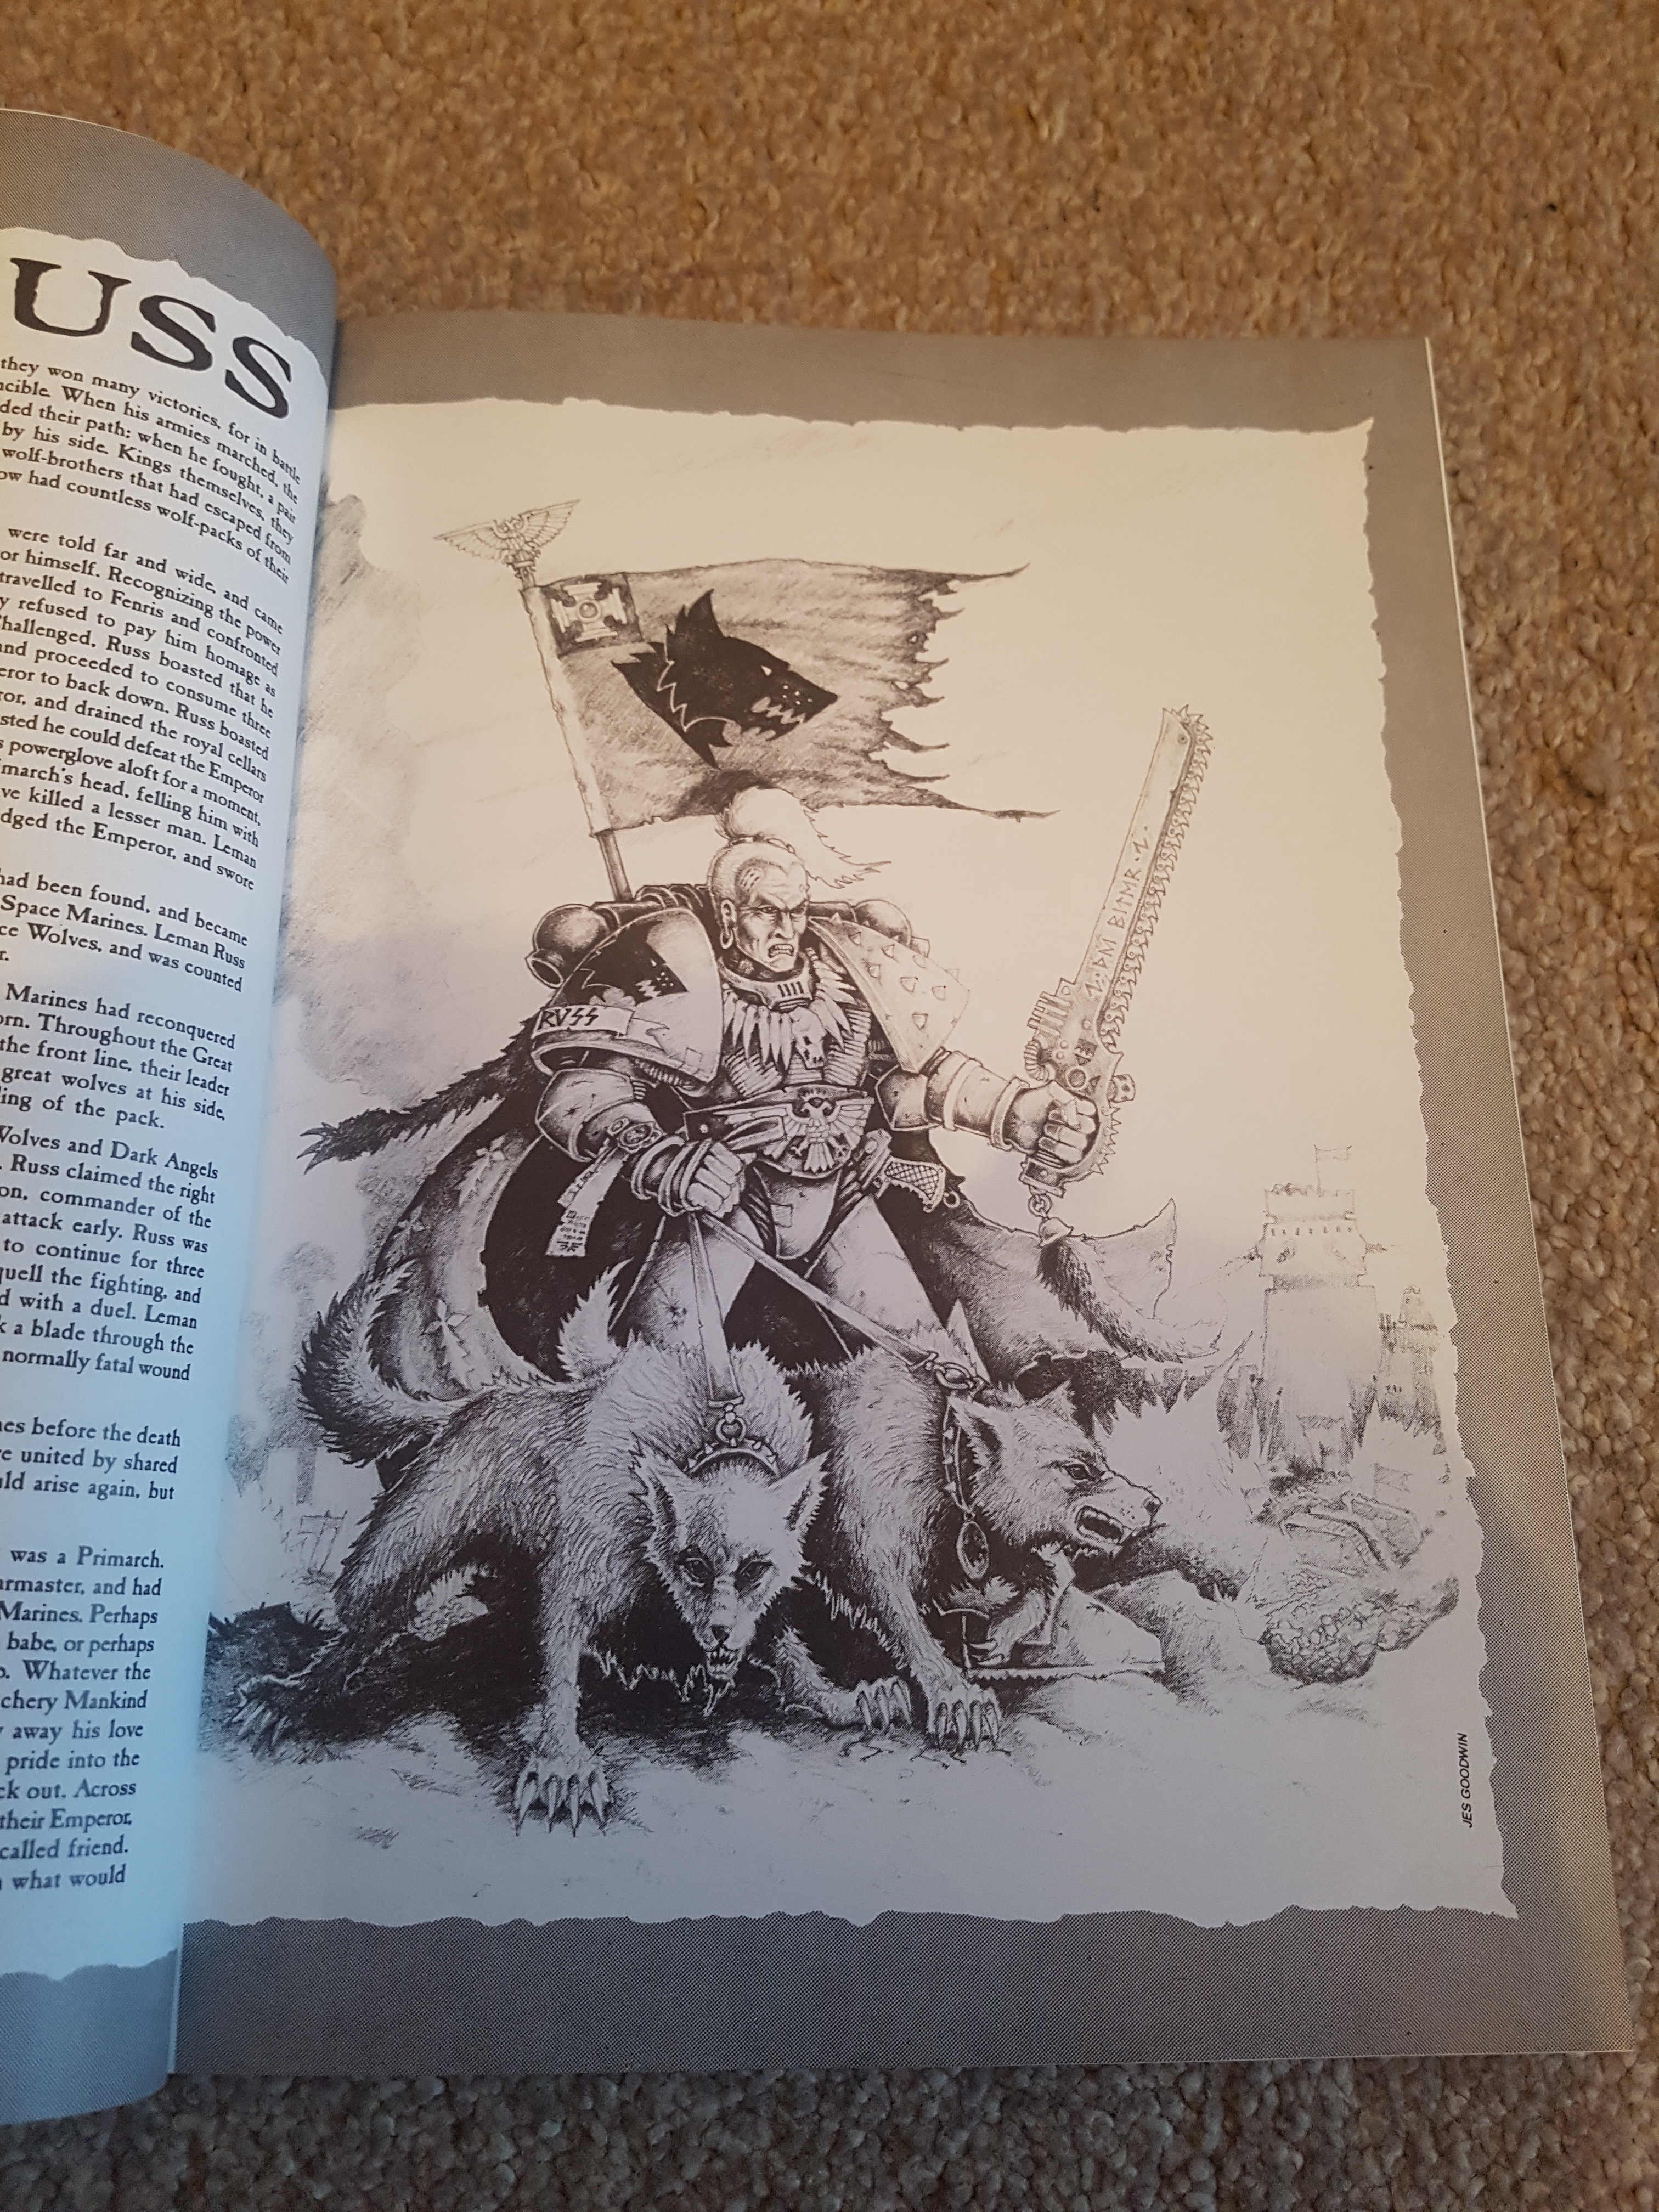
There’s a nice one-page fluff piece on Leman Russ. Probably one of the earliest accounts of the Primarchs, how they were lost and subsequently found, the rivalry between Russ and El’Jonson and a brief mention of the Horus Heresy.

Warhammer 40k Compilation

I’m not sure if it’s all still canon (although it’s probably close) but there’s quite a bit of detail on all 7 of the pre-Primaris types of power armour, written by Rick Priestley. This is all accompanied by new rules for marines. One of which is the increase in Toughness from 3 to 4. Can you imagine, marines used to be Toughness 3! (I guess in another 30 years people will be aghast at the idea that marines used to be 1 Wound!) As part of this there’s also the introduction to Overwatch. It’s a long way from what we have now. It’s actually an opportunity to fire during your opponent’s movement phase as they move from cover to cover. I do remember using those rules, maybe in 2nd ed.

Warhammer 40k Compilation

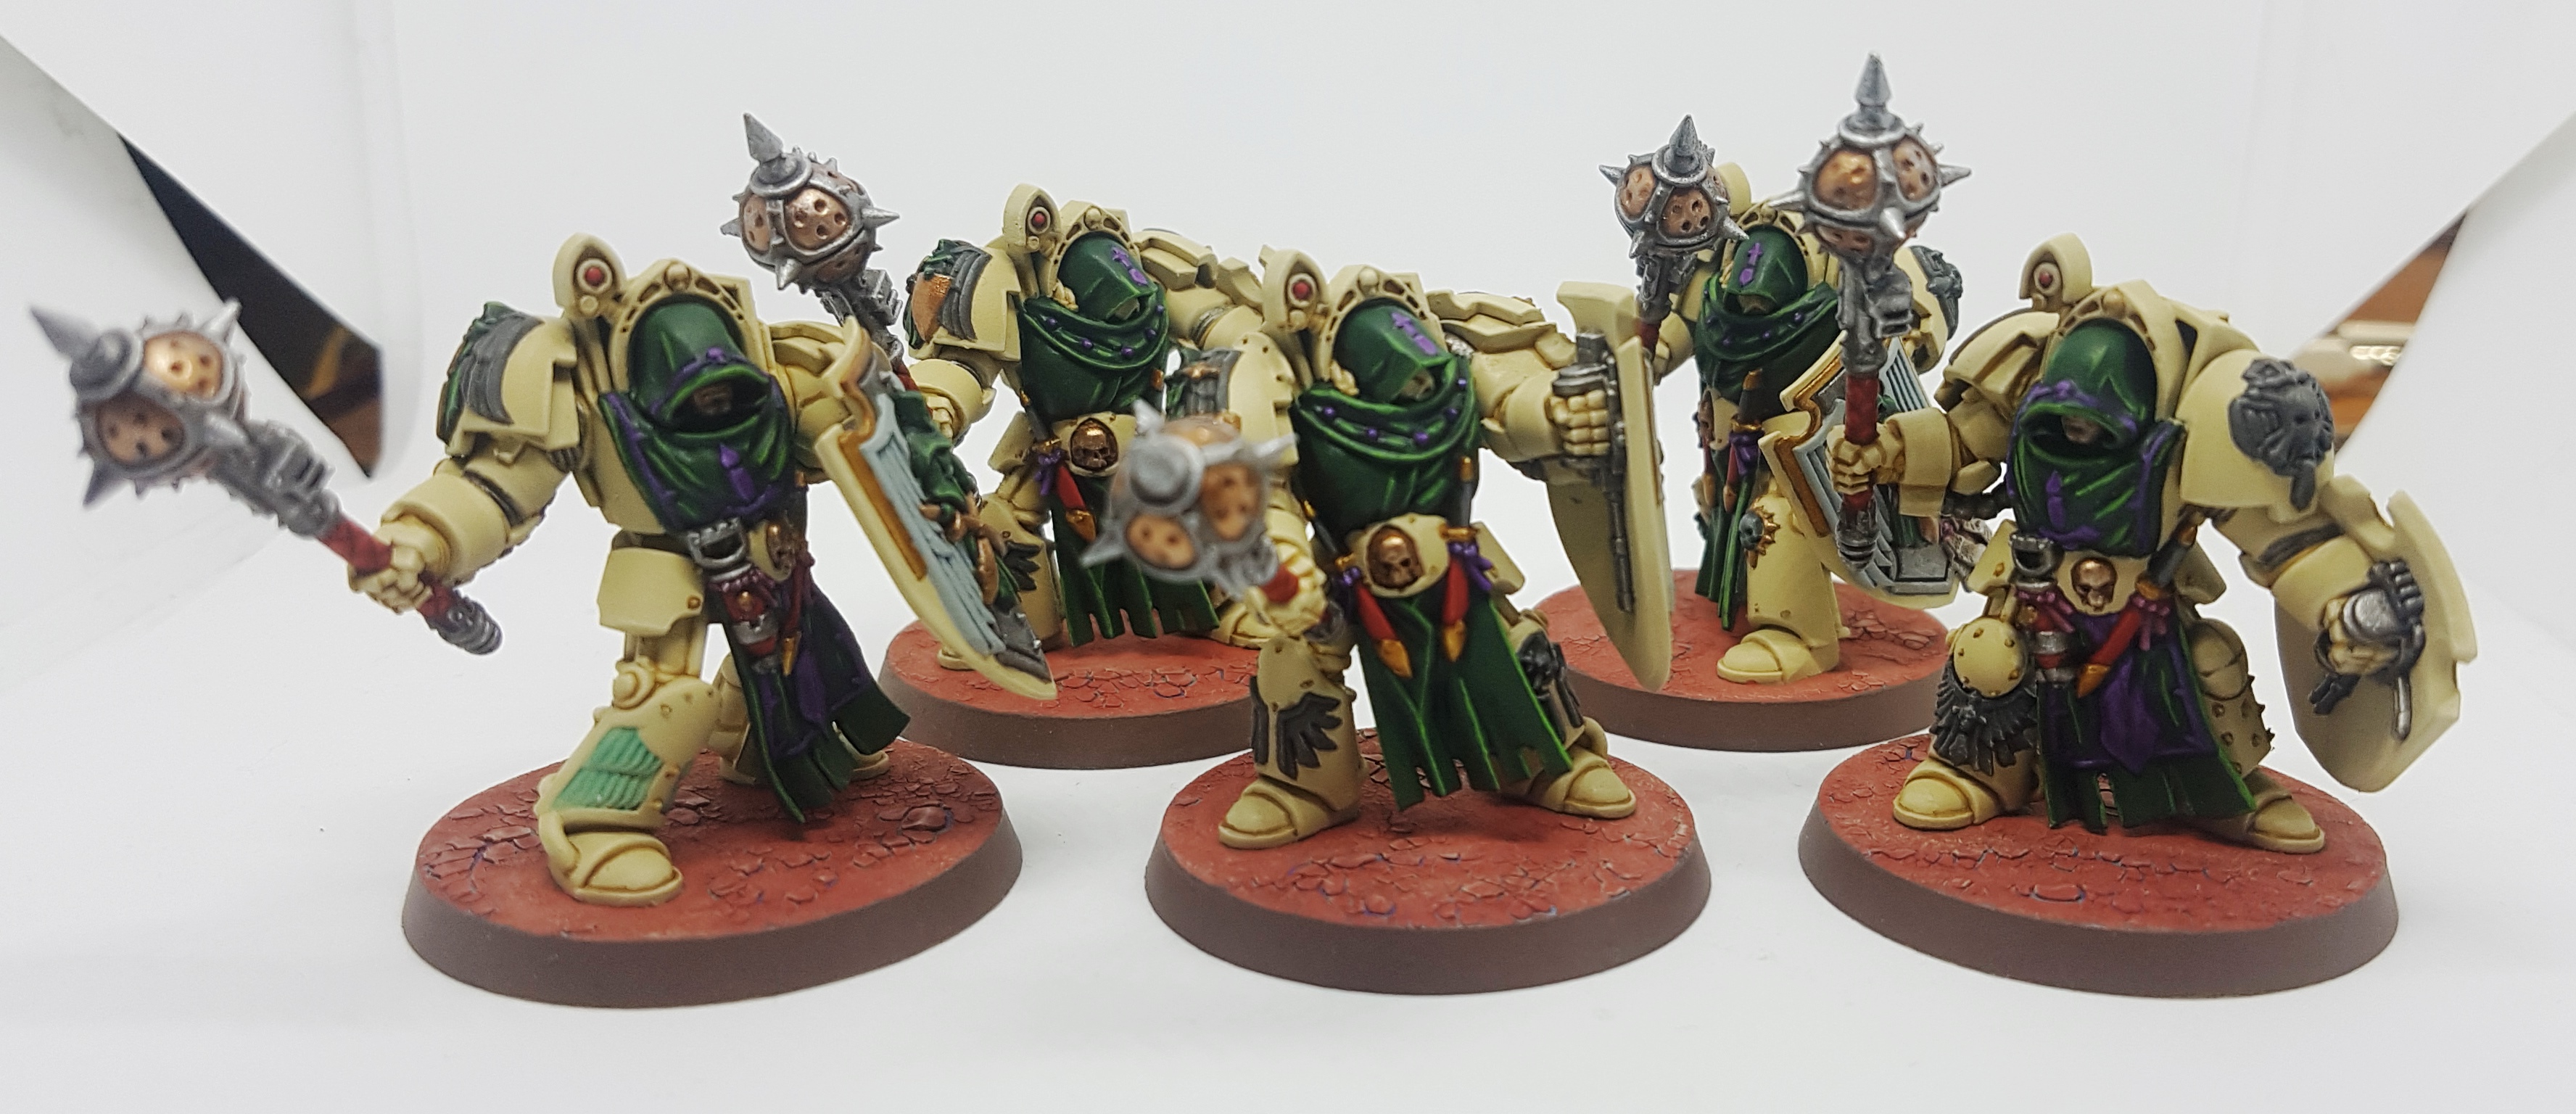
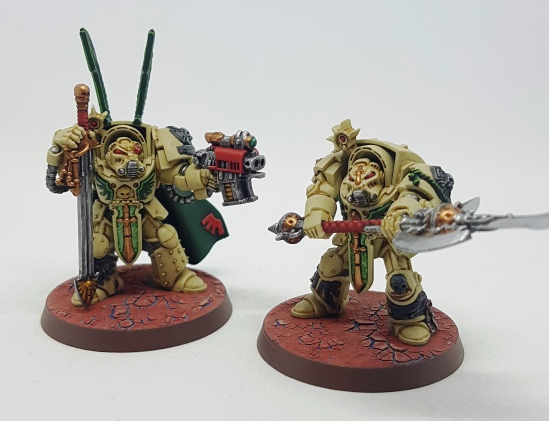
I always enjoy looking at old ‘Eavy Metal models in old White Dwarfs and this compilation of White Dwarf articles doesn’t disappoint. These are various Tactical marines painted in the nice bold colours of 1st and 2nd ed. It’s accompanied by fairly detailed notes about chapter and squad insignia. I don’t remember seeing that kind of nerdy detail in recent publications. I don’t think anyone cares what colour the blood drop on the shoulder pad of a 3rd company Blood Angel is anymore!

Warhammer 40k Compilation

Next up is the Eldar. There’s pages and pages of fluff – before The Fall, their psychic abilities, spirit stones, runes, The Fall, craftworlds etc, etc. I’m not sure, but this might be the first detailed background on the Eldar. At least the first time all together, given these are from various WD articles, I guess.

Warhammer 40k Compilation

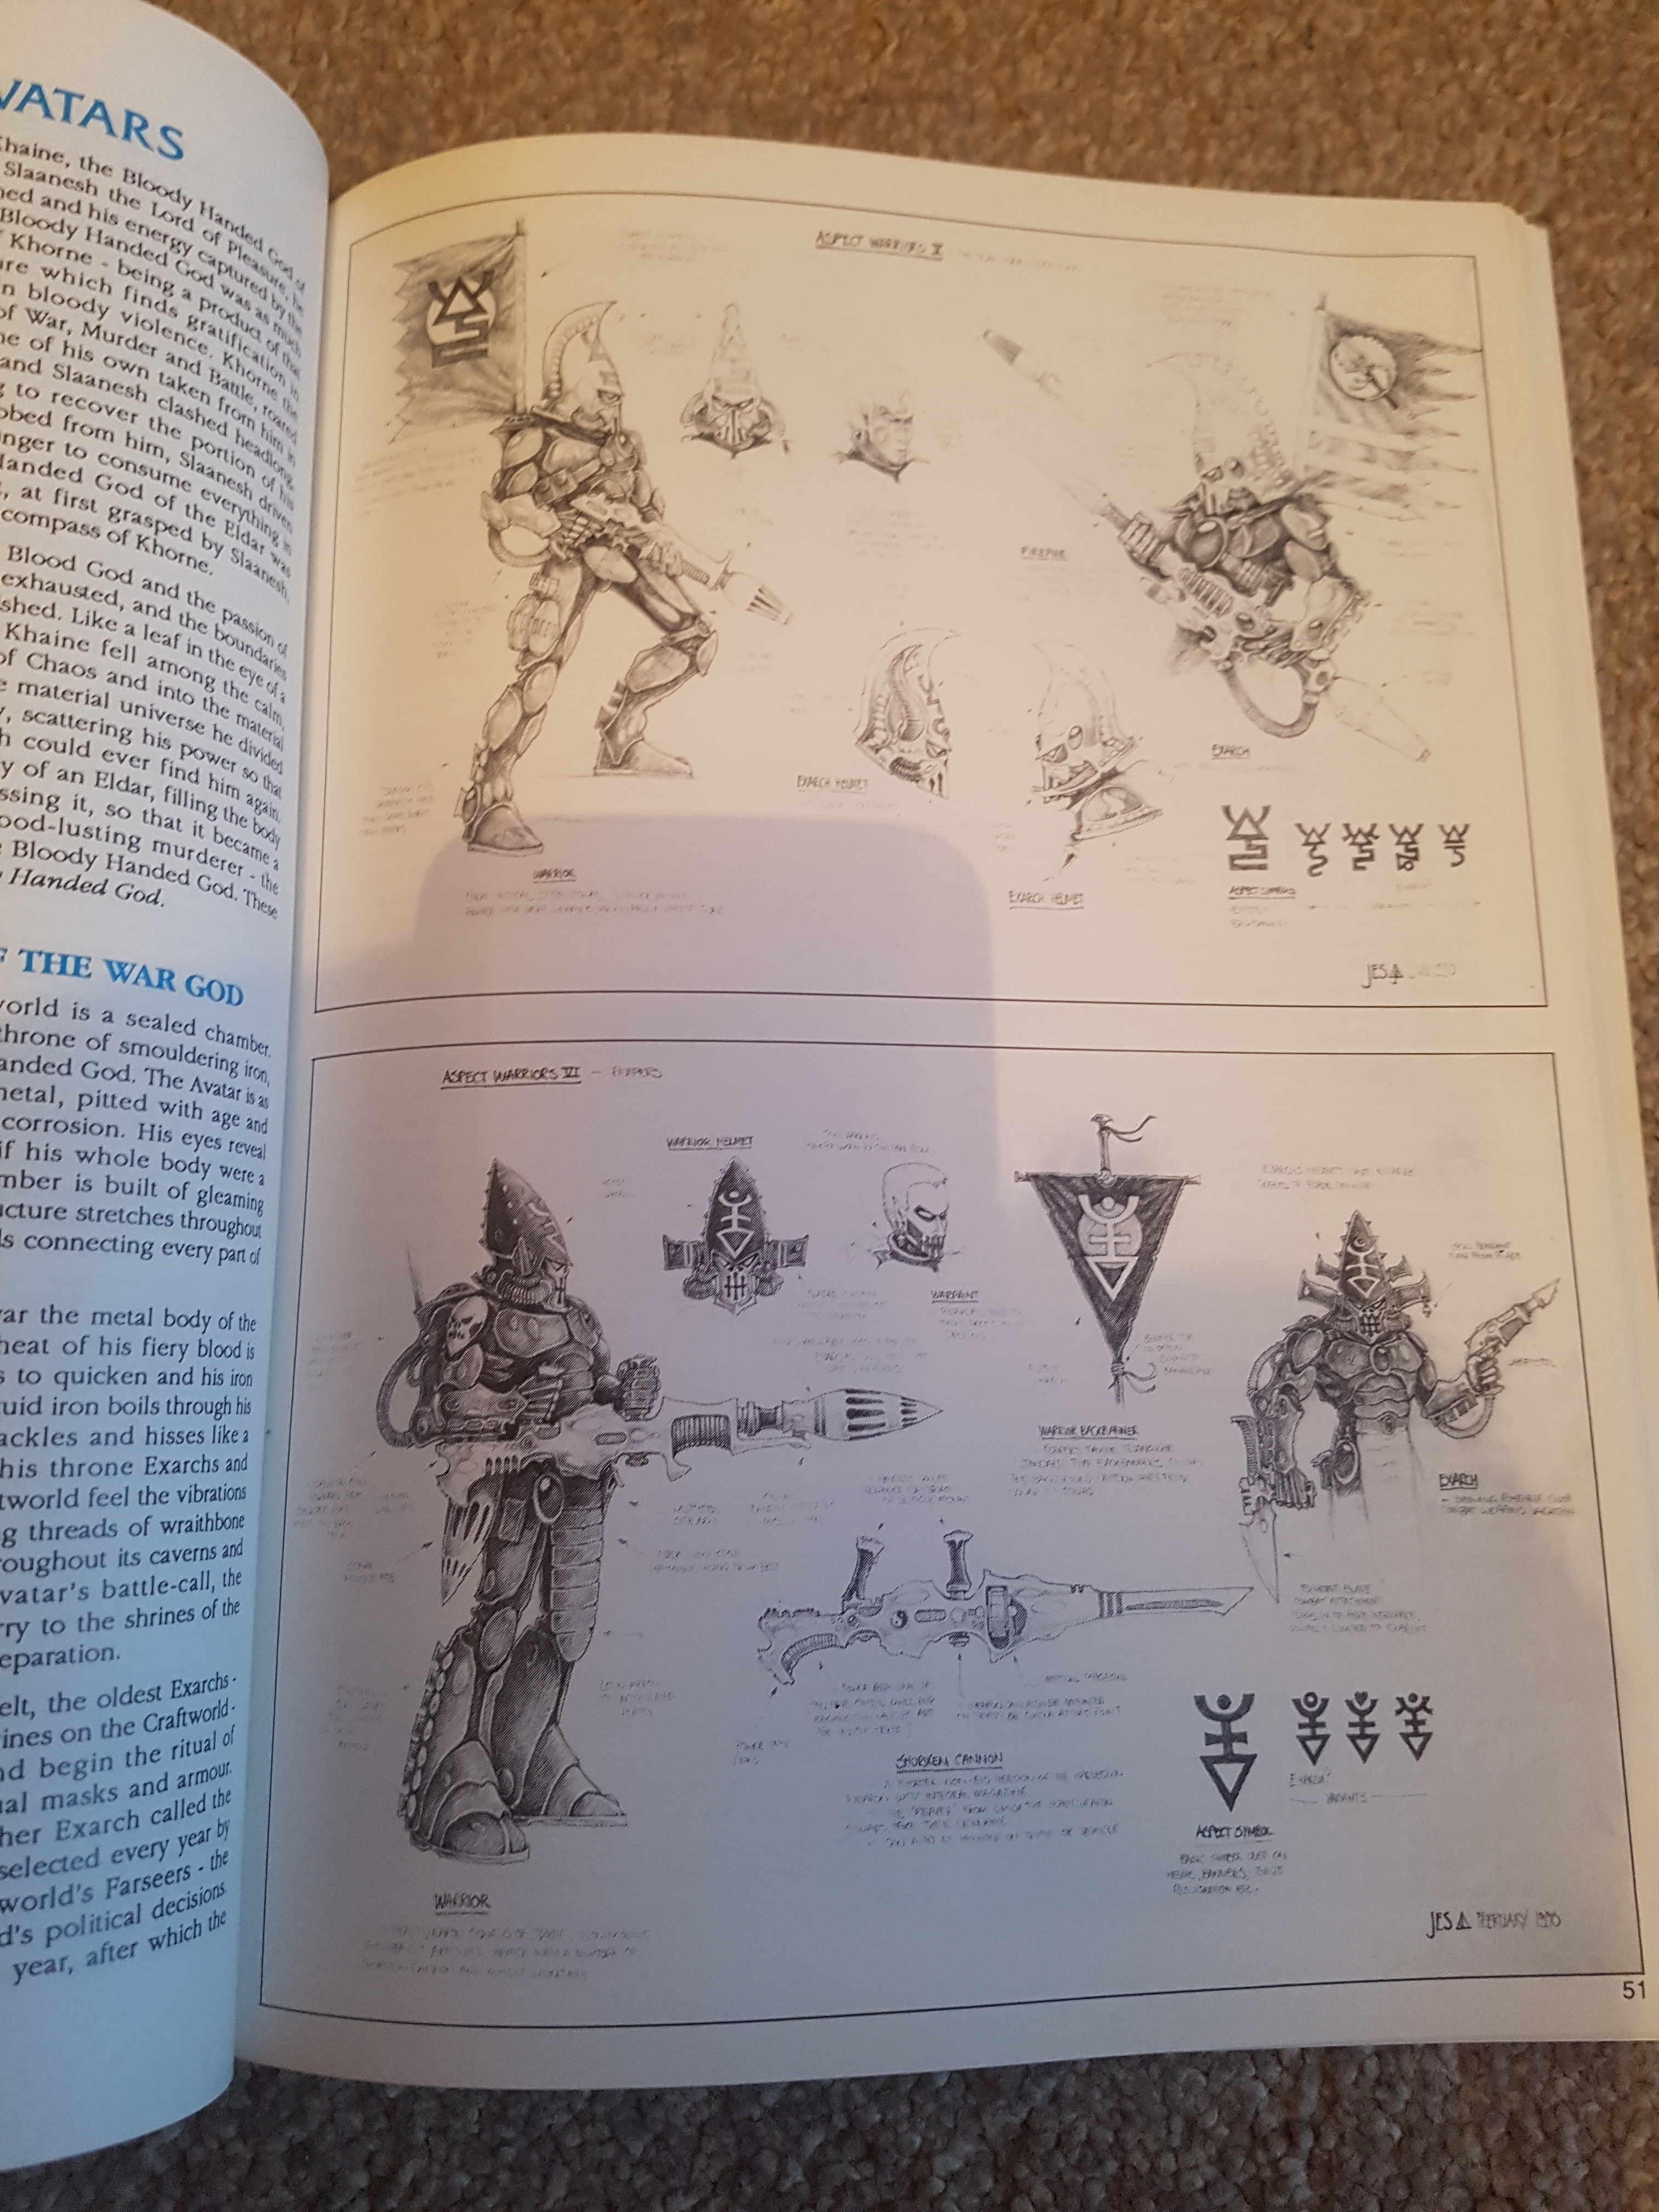
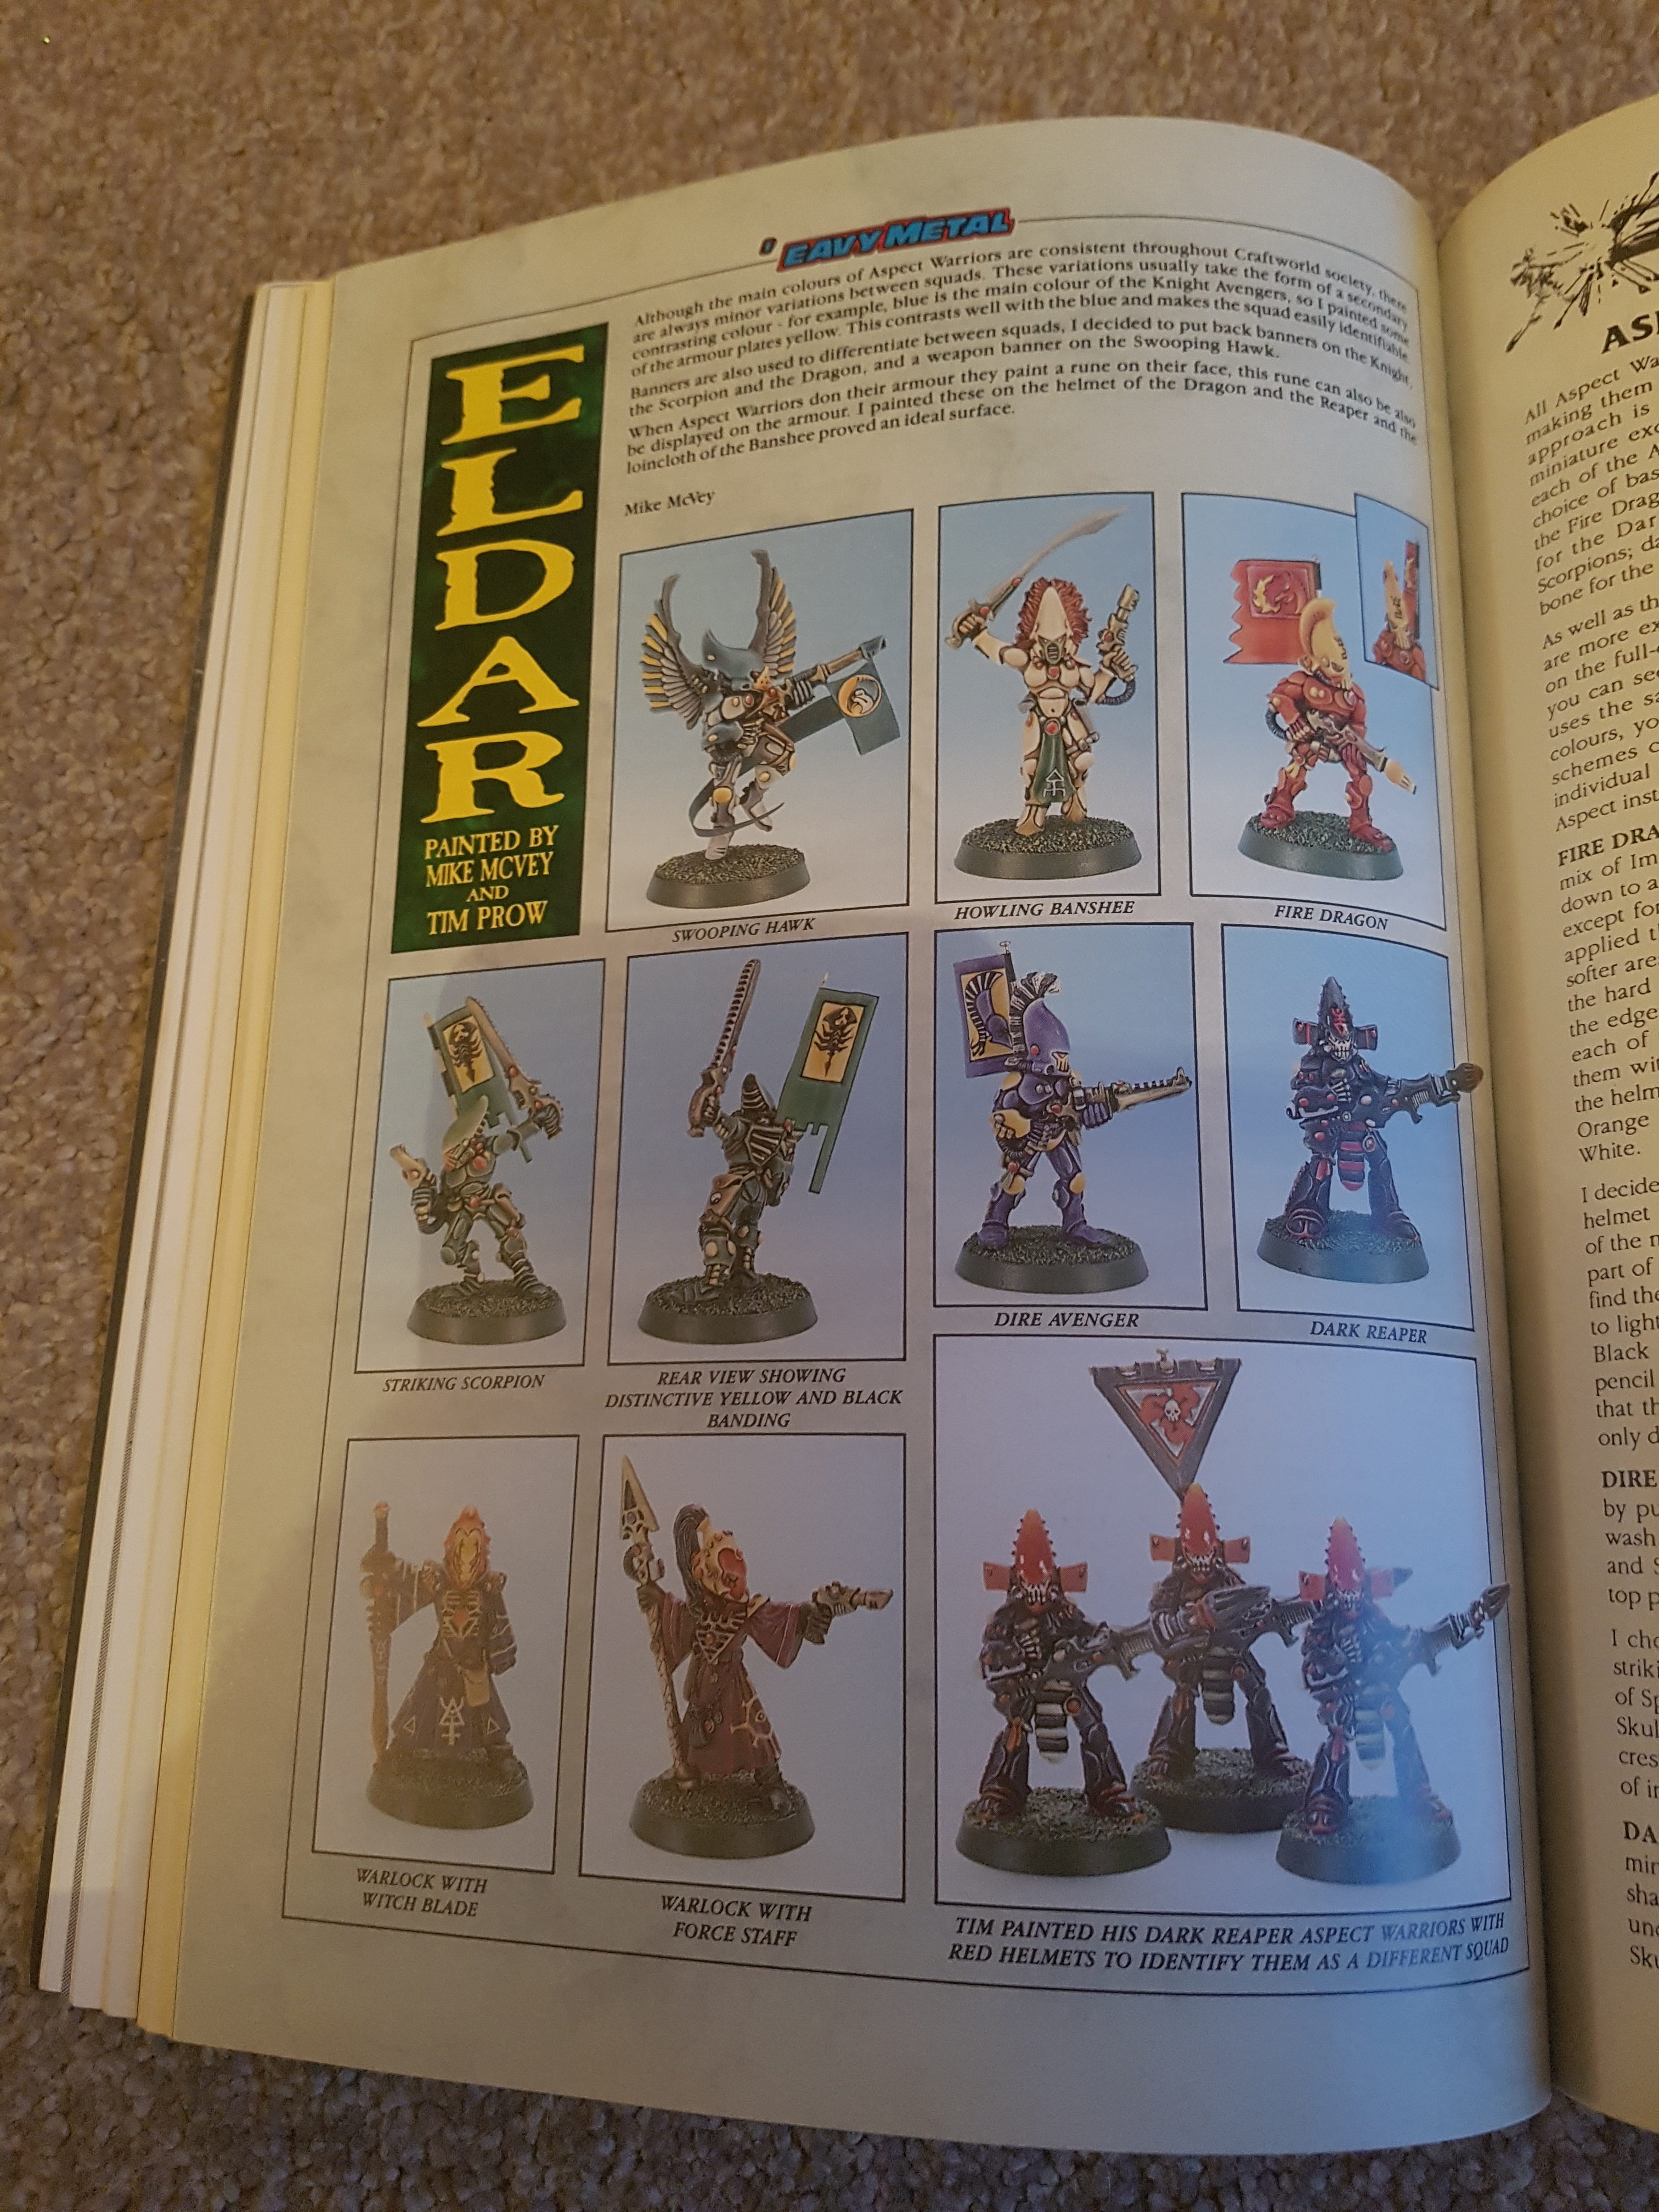
In fact, this is pretty much a mini-dex (before they started producing codexes). There’s details on the Avatar, Aspect Warriors, Exarchs, there’s some great sketches by Jes Goodwin and then there’s a fairly comprehensive army list. And of course, some more ‘Eavy Metal!

Warhammer 40k Compilation

The stats for the Avatar are fun. WS, BS, S, T, W, I and A are all randomly generated. So WS and BS are both D6+4. It says it’s to represent that all the Avatars are different and that you can reuse the same Avatar or generate a new one next game. Lots of opportunity to ‘game the system’ there, but it was a different, more innocent time!

Warhammer 40k Compilation

Exarchs can randomly select an Ancient Weapon. Roll a D100 and consult a table and your Howling Banshee Exarch could have a Firepike, or your Striking Scorpion Exarch could have a Web of Skulls. Very odd. A classic Rogue Trader era random table. It really was a part of the 1st ed DNA, but given where the game is now, it’s pretty weird to be just rolling D100 to equip your models. There’s another one for the Exarch powers too. Why would you want your Dark Reaper to have Bounding Leap?!

The final section is all about Genestealers. As with the Eldar, there’s background fluff about the Stealers and cults, as well as the army list (more D100 random tables for weapons and equipment) and various special rules on cults, psychic abilities etc. There’s a surprising amount about cults, physiology, special rules, army organisation and even using beastmen and chaos spawn.

Warhammer 40k Compilation

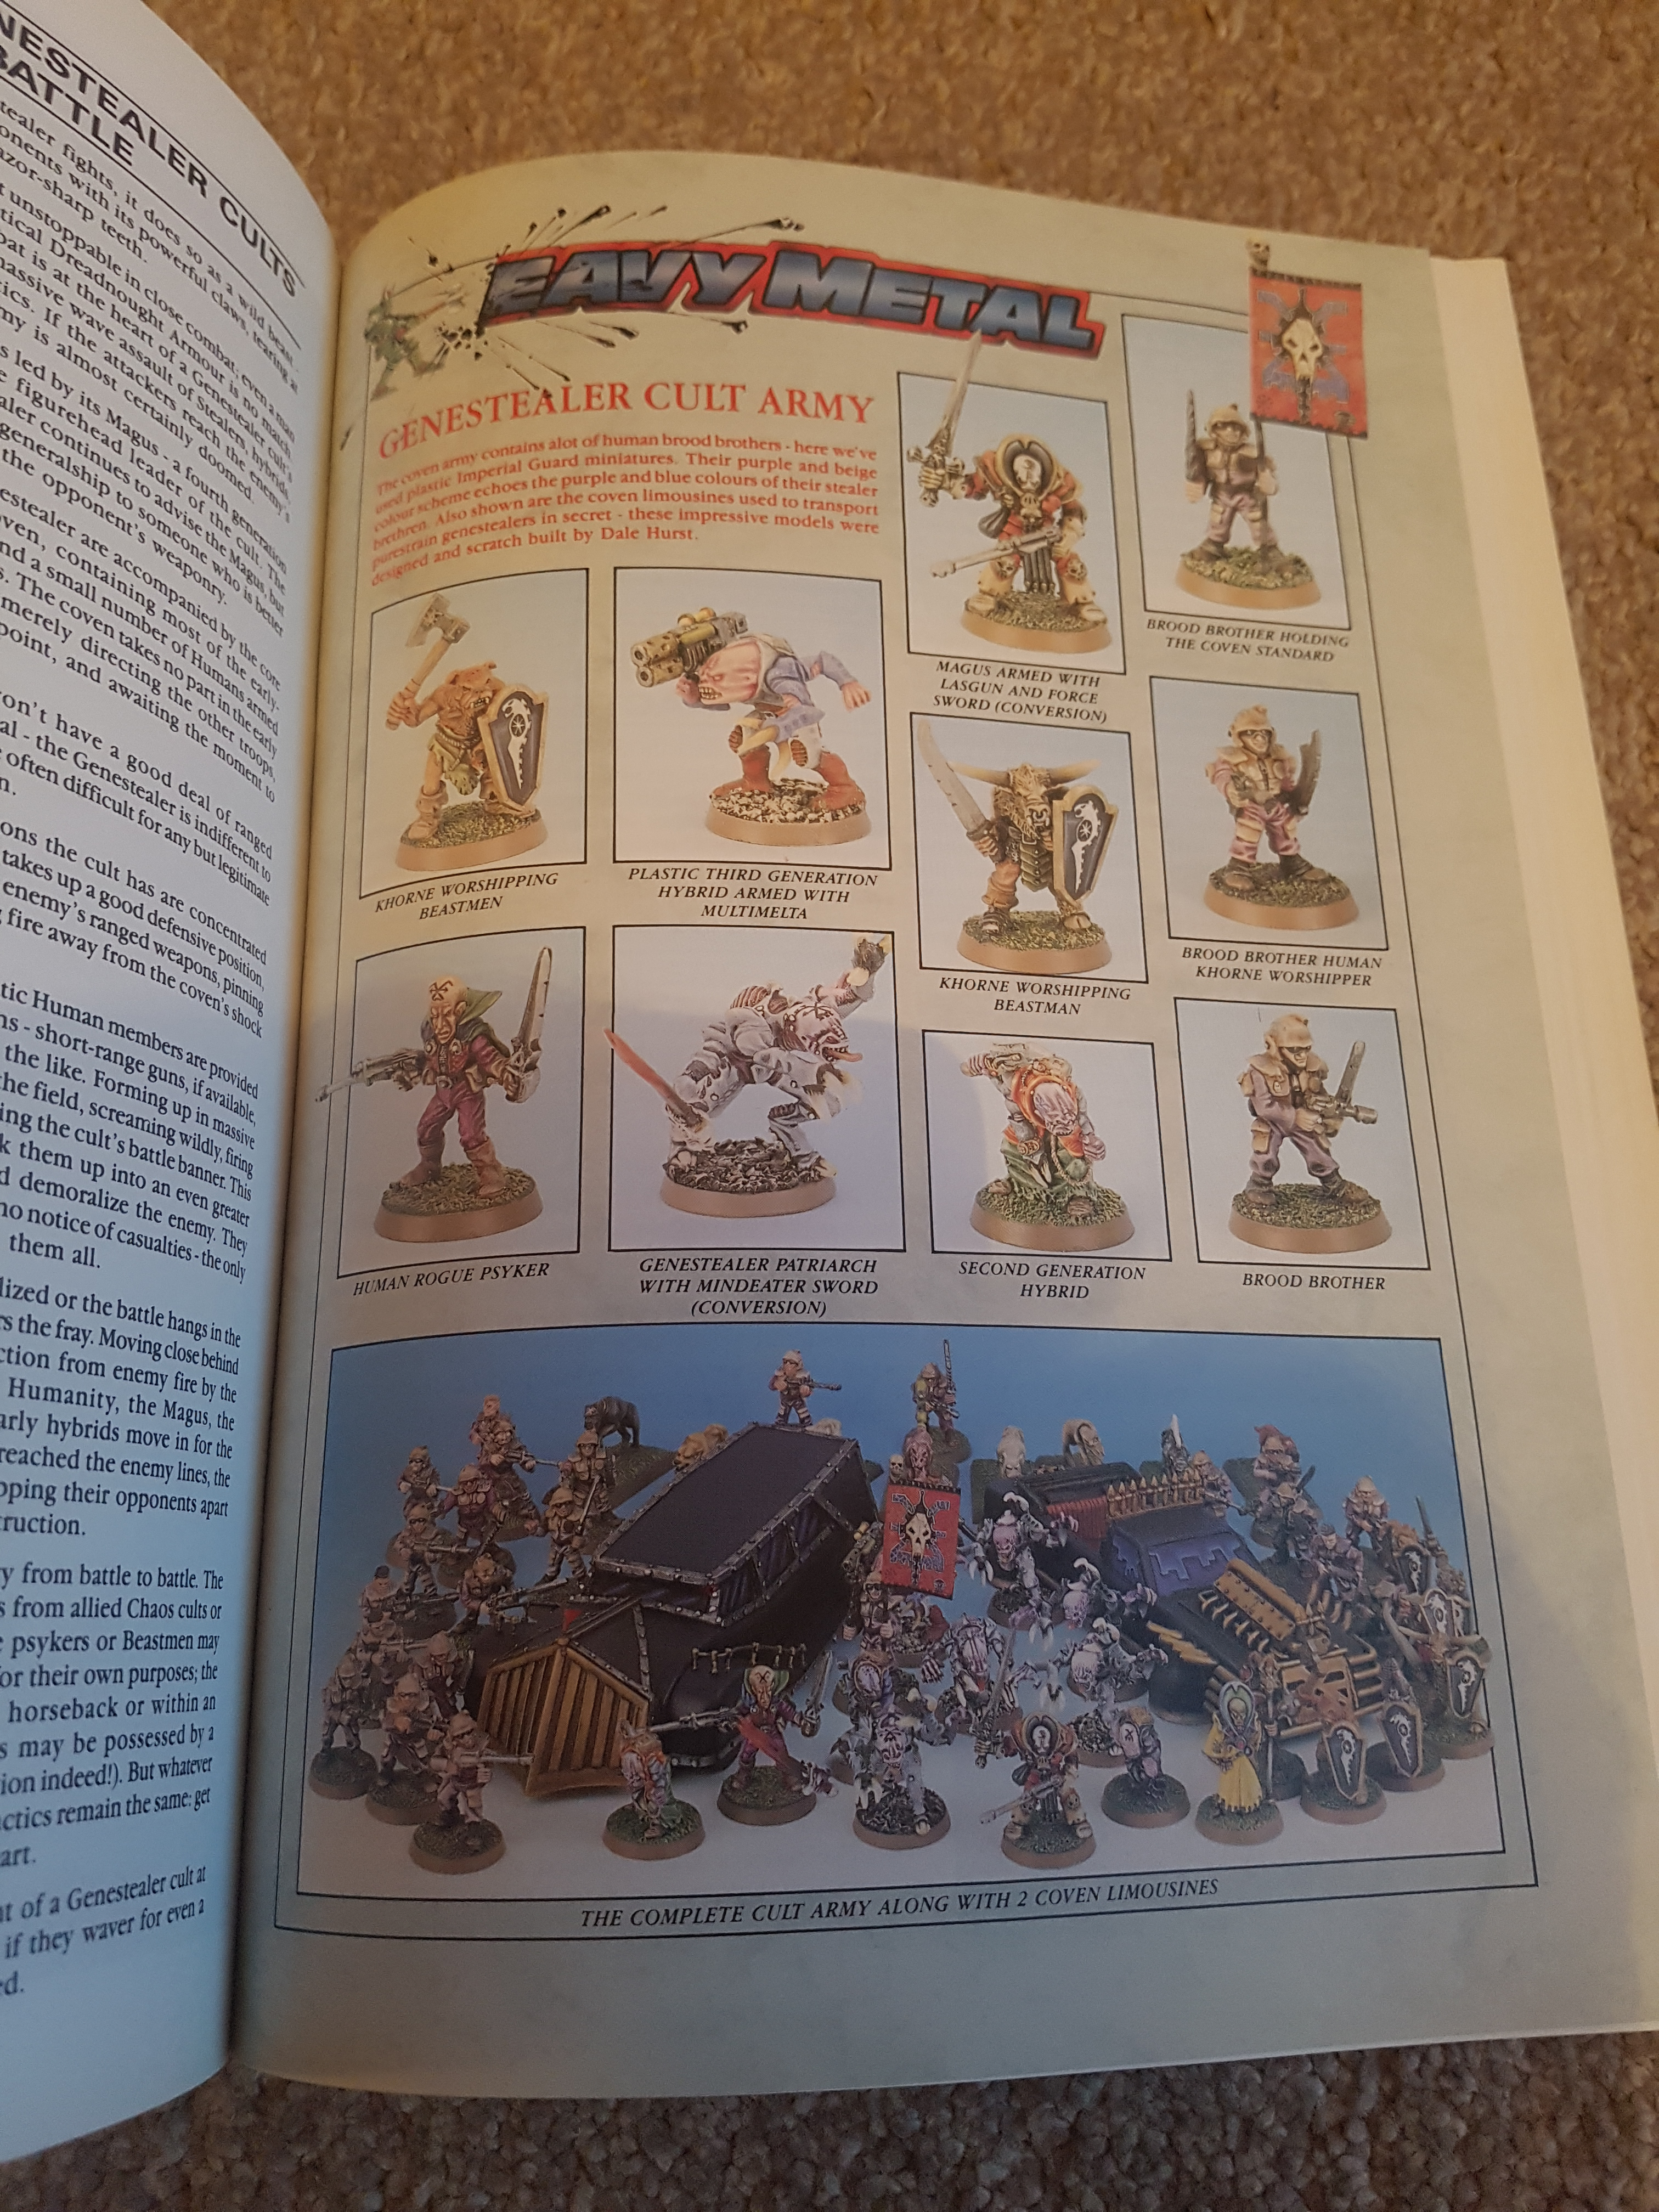
There’s black and white sketches scattered throughout, in the usual 1st ed grimdark style, including a full page one from John Blanche depicting a genestealer cult with a cheeky purestrain in the background. And for a bit more eye candy there’s another Eavy Metal page, including some lovely coven limousines, and an amazing Mike McVey diorama depicting marines and Terminators fighting genestealers – purestrains and hybrids. This was one of the classic pictures of the time for me.

Warhammer 40k Compilation

The rules are as unusual as the Eldar ones. As well as the D100 tables for weapon choice, a coven is made up of a patriarch, magus, D6 purestrains and D6 hybrids, so could be anything from 4 to 14 models all for the same points cost! Fancy a bit of chaos? Let your patriarch be possessed. For just 500 points he can be a daemon prince, great unclean one, bloodthirster etc. He can even be a Nurgling!

Warhammer 40k Compilation

Then we get to the back pages, and in traditional White Dwarf style of the time (and remember although it feels like a bunch of mini-dexes, it’s really just White Dwarf articles bunched together in one place) it’s the mail order pages. Black and white images of the individual models you can buy. I miss being able to pick up that exact model or sprue that I need. There’s a Leman Russ model (misspelt Leaman!) that’s no bigger than any other marine. Imagine that now!

Warhammer 40k Compilation

And that’s it. I don’t think I meant to do a big old review like that, just flicked through and made some notes and that’s what came out the other end. I hope it’s either given you a rose tinted nostalgia trip to the early 90s, reminding you of a simpler time, or an insight into the early days of Warhammer 40k if you weren’t fortunate enough to experience it at the time.

And a final image, the triumvirate of 1st ed Rogue Trader rule books…

Warhammer 40k Compilation

Rhino LEDs

Another old post from my DakkaDakka account from mid-2016. This time looking at fitting LEDs into my classic Rhino.

This is what we’re working towards –

But before we do anything with need to understand LEDs and electricity. I’m not going to give a full physics GCSE course, but I’ll cover the basics and give some links to good related tutorials.

Create the circuit, complete with LEDs, resistors, battery etc on a breadboard to prove the circuit before you go near wiring anything into the vehicle. A breadboard is basically a testing board where you can easily plug in components such as LEDs and check the circuit. You can see the breadboard in the middle of this photo, along with some prototype boards (back right), resistors and switches.

You must include a resistor in the circuit, otherwise you’ll just burn out LEDs. Here is some good info on resistors and resistance. To work out what resistor you’ll need you’ll need to use Ohm’s Law: V = I.R (where V = voltage, I = current in amps, R = resistance in Ohms). The voltage is from whatever battery you’re using. I used CR2032 coin cells which are 3V. The current is the current of the LED. This should be measured in milliamps, or mA and should be on the data sheet for the LED. The ones I used are 20mA. So this gives us 3 = 0.020 x R, or R = 3 / 0.020. So R = 150 Ohms.

This means the 3V battery will provide a current that’s limited (due to the resistance of the resistor) to 20mA, so the LED won’t get too much current and blow. It actually makes sense to use a slightly higher resistance, maybe 180 Ohms. It might depend on what resistors you have available and what the values of your LEDs and batteries are, but always go over on the resistor, not under. You can also combine resistors, so if you find you need a resistance of 165 Ohms, you can use a 150 Ohm resistor and a 20 Ohm resistor in serial to give 170 Ohms. See the link above to SparkFun for more details on resistors, values and combining them.

Now we need to check the forward voltage drop of the LED. Again, this can be found on the LED’s data sheet. The ones I used had a voltage drop of 1.8-2.2V. This means that the voltage coming out of the LED will be 1.8-2.2V less than what went in. So with a 3V battery powering an LED (+ side of battery connected to – side of LED), the voltage coming out of the + side of the LED will be about 1.2V. If you then have a second LED there’s not enough power to light it. Try this on a breadboard and you’ll probably see both LEDs lit very dimly. Add a third and they won’t light up at all. I have 8 LEDs in my Rhino, so we need another solution – I don’t want to have to use 5+ batteries!. See SparkFun for more useful info on LEDs. Note: LEDs’ legs are different lengths. The long one is + and the shorter one -. If you get an LED the wrong way round it won’t work, but it won’t damage the LED, so if your circuit isn’t working, just flip the LED around to see if that’s the problem.

One last thing to check, which shouldn’t be a problem if you’re using an appropriate battery, is the power going through the resistor. If there’s too much power to the resistor you’ll burn it out. To work out the power (Watts) use P = V.V / R. So with our values that’s 3×3 / 150 = 0.06W. My resistors are limited to 0.25W, so are easily up to the task.

What I described above – having a battery wired to an LED (positive to negative), then that LED wired to another one (again positive to negative) etc – is a ‘serial’ circuit. You have one component after another in a big loop. However, if you wire the LEDs in parallel, the forward voltage drop isn’t cumulative, so you can power all 8 LEDs from a single battery (I assume this will affect battery life, but I’m afraid I don’t know how to calculate that – can anyone help?). In a parallel circuit you effectively run a single wire from the positive side of the battery to all the negative legs of the LEDs. Then a single wire from all the positive legs, back to the battery (remember to put the resistor between the battery and LEDs on one of those wires too – it doesn’t matter which side). More info on serial and parallel circuits.

So on your breadboard you should now have a battery wired up (best to use a holder for the type of battery you’re using – it’s easier to wire up and you’ll need one in your Rhino or whatever vehicle you’re lighting up), a resistor and one or more LEDs in parallel. Rather than pulling the battery out to turn the lights off, you just want a switch. You should be able to just drop an on/off switch into the circuit, maybe just after/before the battery. This will allow you to just flick a switch to turn the lights on and off.

Okay, that’s the physics lesson taken care of, now you need to fit it all into a tank.

My LEDs are 3mm, so I drilled holes of about 2mm everywhere I wanted a light. I didn’t want the LEDs sticking right through, but rather be sunken. Obviously, if you want them coming right through you’ll need a 3mm hole. I then widened the holes on the inside to allow the LED to sit in a bit deeper. It all depends where you’re putting them and how sunken you want them to be. I used superglue to fix the LEDs in place. I’ve not had a problem yet doing that, and as long as you’re careful and don’t use too much glue, you shouldn’t cloud the LED lens.

Next up is the wiring. I soldered a wire to each leg of each LED, so 16 wires in total. Because all my lights are in pairs, I actually pulled the legs on each pair of LEDs together, so I could solder a single wire to each pair, so I ended up with 4 positive wires and 4 negative wires. I used one colour for all the positive legs and another colour for all the negative legs. I fed all the wires through the hatch on the bottom of the Rhino. It depends how you want to access the battery and switch as to where you’ll need to run the wires. You’ll probably also need to cut out some bits of plastic on the inside to be able to run all the wires through. It’s not a very clear picture, but this shows the wires coming from the LEDs in the back of the Rhino –

And then this one shows some of the wires coming out of the bottom hatch –

In the foreground of the above you can also see a small piece of prototype board with a battery holder. Prototype board is circuit board with loads of holes in to allow you to wire up the components however you like. You’ll then need to solder them in place and to connect them together. I made the board small enough to fit on the back of the hatch, and added the battery holder, resistor and switch to it. All the positive wires from the LEDs were soldered to one spot on the board and all the negative wires to another. These could then be soldered to the respective parts of the circuit.

To make everything fit (and it’s pretty tight), I put all the components on one side of the board, and glued the board to the hatch with small pieces of sprue. This gave a gap between board and hatch to fit the switch. Finally, the hatch was magnetised. So I can pop the hatch off and get relatively easy access to the switch, and if I need to I can pull it a little further out to swap out the battery. Make sure you have enough length on the wires to allow you to do that. I made a few of my wires a little short, so it’s not as easy as it should be!

So, I hope that all helps you to understand what’s needed for create a circuit for your LEDs. You can use this to light up anything really – tanks, terrain, stompas – whatever takes your fancy. Make sure you have sufficient resistance (you don’t want to have to swap out burnt out LEDs) and easy access to the battery and switch.

Thanks to SparkFun, which is where I got all my info from when doing this. Their various tutorials on resistors, LEDs etc are really useful, and there’s loads of other links to Ohm’s Law, serial and parallel circuits and other useful info.

As for sourcing components, this is what I bought (all from eBay, mostly from China):

– Breadboard £3.15
– 100x 3mm LEDs £1
– 200x 3mm ultra bright LEDs £2.11
– 300x mixed resistors £1.03
– 10x prototype boards £1.14
– 20x on/off slide switches £1.99
– 10x battery holders £0.55
– 5x CR2032 3V batteries £0.93

And this is the post I put here to the finished and painted Rhino: Stark Crusaders: Rhino with lights

Deathwing – Knights (Part II)

Another five Knights completed. These fellas really do take ages to finish. There’s so much detail on them. I’ve tried to keep things simple with my Deathwing, just the main colours – bone, silver, red, green, grey and bronze – but with the Knights there’s so much more. At least it keeps me busy!

There’ll be five more coming at some point, but I think I’ll start on the Redemptor first.

Deathwing Knights
Deathwing Knights
Deathwing Knights
Deathwing Knights

This has just been a quick update post, but hopefully I’ll have something a little different and interesting in the next few. Watch this space.

Deathwing So Far

Deathwing

I’ve been painting my Deathwing for about 9 months now, so I thought it time for a group shot. It doesn’t really look like much for 9 months work, but I guess there was plenty of other stuff going on last year!

These guys come out at about 1700pts / 85PL. A reasonable sized force. I’m working on another 5 Knights at the moment, then I’ve got 5 Terminators, 5 more Knights and a Redemptor to add to them. That should give a few options (if I ever get chance to actually use them!!).

Also, I’ve updated my blog a little – there’s now a Deathwing Gallery, and a White Dwarf section that I’ll be adding to soon, showing off my growing collection of old magazines.

Deathwing
A strong leadership – Master Mallen, Librarian and Chaplain Brehgen

I’m going to try to name most (maybe even all) of my Deathwing. A number of the names came from a short story in the 1st Edition Warhammer 40k Compendium that I included at the end of this post, including Master Mallen and Chaplain Brehgen (let’s not mention that that story was actually written about Blood Angels!).

The Champion, Ancient and Apothecary round out my characters and are lingering around behind the leaders.

Deathwing
Venerable Dreadnought Contumax

Contumax is latin and means stubborn, rebellious, self-willed – seemed fitting for a dreadnought.

Deathwing
Deathwing Terminators – Sergeant Kinner, Brothers Straus, Felko, Levi and Gorrias (plasma cannon)

The first five terminators – all named, again from the story in the 40k Compendium.

Deathwing
Deathwing Knights

I was thinking of using the names from Bill King’s “Deathwing” short story from circa 1990, but with names like Lame Bear and Cloud Runner, I don’t think they quite fit modern Dark Angels. I’ll have to find another source of inspiration (or even think for myself!).

I’m looking forward to using these guys. I’ve used them once, but there was only 5 of them and I didn’t get the most out of them. Looking forward to another run out with them.

Deathwing
Land Raider – The Wrath of the Lion

I really like the Land Raider – “The Wrath of the Lion” – and the stylised lion representing Lion El’Jonson. Bit pricey points-wise, so might not see that much action, but a nice model!

Deathwing

The second half of my terminators. If you’re eagle-eyed you’ll spot there’s 11 of them in total. This is because I have 2 plasma cannons and a Cyclone Missile Launcher – just to give me options.

So all in all, a decent force. Looking forward to getting the last knights and terminators finished, as well as the Redemptor. Then might add a few more models and that’s probably it – probably a Strikemaster (the Deathwing Lieutenant) and maybe a second Redemptor.

Deathwing – Ancient and Apothecary

Pretty much rounding out my Deathwing characters are my Ancient and Apothecary. I’ve also completed a Cyclone Missile Launcher to add to the Deathwing Terminators.

Deathwing Ancient

I thought the banner was going to be a nightmare, but because it’s all molded detail it wasn’t too bad. I’m pretty pleased with the end result.

Deathwing Ancient
Deathwing Ancient

White is always tricky. Luckily for me the Apothecary is mostly Deathwing bone, with just enough white that you can tell what he is!

Deathwing Apothecary

And finally it’s the Cyclone Missile Launcher. Always wanted one of these back in the 90s and I’ve finally got one!

Deathwing Terminator Cyclone Missile Launcher

I think for the next post it’ll be time for a group shot – all the Deathwing I’ve got painted up so far.

Fun with Magnets – Vanguard Veterans

Next up is my Vanguard Veterans. They can have loads of different weapons options, and because I’ve got 10 of them, I wanted to be able to run them as a squad of 10, or 2 squads of 5 (although in the end, 2 of them ended up as a captain and librarian, so I can’t split them into 2 units now). Depending on what I’m up against, how I feel, what else is in my list etc, I might want them to have the option to shoot, or be totally close combat. Basically, I want lots of options available to me.

Enter the magnets…

Take this guy as an example, I could have him with a power fist and lightning claw:

Or with power sword and bolt pistol:

I’ve got a lot of models like this, where the arms detach at the shoulder. This is because the power fists and lightning claws are a single piece from shoulder to hand, whereas if you’re just swapping weapon, say changing a bolt pistol for a plasma pistol, you can glue the arm and just detach at the wrist.

It’s actually quite easy to do this. I generally drill a hole that’s two magnets deep. One mag gets glued in the hole and the other on the shoulder. When you place the arm on, the magnet on the shoulder that sticks out disappears into the deep hole to find his magnettey friend.

As I’ve mentioned above, the other option is to magnetise at the wrist. This is good for swapping guns, power swords, storm shields etc. I’ve even magnetised at both the wrist and shoulder in some cases. This is my second serge – he’s magnetised at the wrist so can have a power sword or storm shield:

He’s also magnetised at the shoulder so he can have a lightning claw instead. I’ve also magnetised his head, so he can have a helmet and be a regular veteran, or be bare-headed as a sergeant:

This shows his arm magnetised at the wrist and shoulder. It shows the shoulder magnet a little clearer than the earlier pic too:

The technique with the wrist mags is the same – drill double depth into the arm, so one magnet is sunken and the other stands proud on the wrist of the weapon. When put together, the weapon’s magnet disappears into the arm. Just watch out when drilling. I use 2mm magnets and the arms are about 2.5mm in diameter. You’ve got to drill very straight!

This is my serge with 4 different arm options – all glued at the shoulder and just swapable at the wrist:

I’ve really gone to town on these guys. I’ve got 10 men and I’ve used 59 magnets (so far – I could add more weapon swaps from my bits box!)

And you can see the first five veterans painted up here, and the second batch here.

Deathwing – Land Raider

After a mere three months, I’ve finished my Deathwing Land Raider – “The Wrath of The Lion”. It’s not that it was a particularly difficult model to paint, but more I just didn’t spend that much time painting each day, and got a little distracted by some other Deathwing models (more on those in a later post).

Deathwing Land Raider

Some of the little details I’m quite pleased with are the heat scorched gun barrels on the assault cannons and multi-melta, the parchment on the purity seals, and some of the lenses.

Deathwing Land Raider

But the bit I’m really happy with is the freehand lion on the side. It’s a stylised lion representing Lion El’Jonson. After all, this is The Wrath of The Lion, and I couldn’t fit all of that on the little parchment on the front. So that just has “Wrath” and there’s the lion on the side.

Deathwing Land Raider

It’s odd how the word “Wrath” was harder to do (and looks worse!) than a picture of an actual lion!

Although freehanded on the model, the design of that picture is stolen from my daughter’s Lion King Pride Rock toy!

Then finally, some magnets (you know how I like a magnet!). Both side sponsons are magnetised, but I don’t currently have alternatives! But when I do get some they’ll be an easy swap. The multi-melta is magnetised so can easily be removed if I don’t have the points to take it along. And in the pics below you can see the storm bolter is swappable with a closed hatch, and the hunter-killer missile can be removed after its one-time use and replaced with a radar dish (these are actually just held on with a pin, not a mag).

Deathwing Land Raider

Fun with Magnets – Predator

I’ve not posted for a while. My painting has slowed down quite a lot. So I thought I’d resurrect some old posts from my DakkaDakka account. I do love using magnets, so I’m going to do a bunch of my magnetising posts.

The first of these is my Predator(/Razorback/Rhino). This is the finished result, containing about 25 magnets.

Predator:

Razorback:

Rhino:

As you can see, I can add/remove sponsons and the turret, and switch which weapons are used. When I get a Hunter/Stalker kit, it comes with both turret weapons. So I should be able to use the Predator for the spare one [I never did get a Hunter/Stalker – this was 4 years ago!].

I started with the side sponsons. I needed to be able to swap out the Predator sponsors, or the Rhino side hatches, so needed a couple of magnets on the hull, and some matching ones on the sponsons and hatches.

Hull:

I added a few small pieces of plasticard on which to mount the mags. I needed to do this before fitting the inner side of the hull:

The side sponson is deep – it sits right in the hole in the side, but the hatch is quite thin so sits a long way off the inside where the mags are. So I had to mount the mags on the hatch on bits of sprue.

I was going to go with mags in each corner, but actually they’re pretty strong and 2 is easily enough. Probably one in the centre would have done.

Pro tip: It’s a pain getting the right amount of superglue on the mags. They’re tiny and you don’t want to get glue everywhere. I put superglue onto the tip of a small needle and just dab that onto the mag. That seems to give just the right amount of glue.

For the turret, I wanted to keep it so it can be rotated 360 degrees, but be able to swap the weapon between the twin-linked lascannon or the autocannon. I also wanted to be able to remove the turret completely and use the tank as a Rhino.

So the first step was to magnetise the Rhino hatches/turret mount. There’s not a lot of space on the little ridge the hatches sit on, so I’ve stuck 2 pieces of plasticard on the inside of the hull and stuck the magnets onto these.

This also means when the hatches/mount are put in place, the magnets are flush. If I’d stuck the magnets on the ridge I’d have needed to do some drilling.

Obviously, we also need magnets on the underside of the hatches/mount, so that required a little drilling. Not that clear on the hatches in this pic, but you can see it on the mount.

Pro tip: it’s really, really irritating when you’ve carefully drilled out the holes, twice stuck the magnet to your thumb before eventually getting the magnet to glue in place – only to put the two magnetised pieces together to find they repel each other! So, once one is glued in place, test fit the second magnet to the first. Mark the side of the second magnet that you can see (marker pen, spot of paint etc) and this is where you should be gluing.

You can now happily swap between hatches and mount – although the hatches aren’t quite as secure as I’d like, so maybe I’ll pop a second magnet on each one towards the middle of the hull next time – so there are two magnets on each hatch, at opposite corners. I’m just going to leave this one – it’s not like they’re fighting gravity. Eventually I want to also be able to use this as a Hunter/Stalker [I really wanted a Hunter back then!], but not sure if it uses a different turret mount. But it doesn’t matter, I can now just swap as necessary.

So that allows us to swap between turret or Rhino hatch. Now we need to consider the gun in the turret. The Predator has a twin-linked lascannon, or an autocannon. I wanted to maintain the pivoting action of the weapon, which is done by just pinching the pivot points of the gun between the top and bottom half of the turret. So I needed to magnetise the turret halves.

The back was easy. I used 4mm magnets for a little more strength. The bottom one just went straight on, but the top one needed a small piece of sprue to raise it up to be close to the other magnet.

The front ones were more tricky. There wasn’t really anywhere to place them, and the angled and small space prevented me from just sticking some sprue in. In the end I put some plasticard in to give two sides at right angles. The magnets then stick on their side only. It’s not the most secure thing, and one side didn’t work at all. Fortunately, it seems one pair of magnets at the front is sufficient. Maybe next time I’d just build up an area with green stuff to glue the magnets to.

So now I can just pull the two halves of the turret apart, swap the gun, and pop them back together.

One last thing I did with the turret was to make the little radar thing and the hunter killer missile swappable. Too small for mags, I just put a little pin in the turret. Then the radar and missile can just slide onto the pin. You can see them swapped over on the pics above. The pin below isn’t that clear – it’s pretty small! I just use a cut up paper clip for pins.

Next up is the pintle-mounted storm bolter.

It’s a pretty simple one. I wanted to be able to add/remove the storm bolter – ideally two of them – so I could keep it WYSIWYG whether it’s a Rhino or Predator. I tried test fitting two storm bolters, but the mounting for it is too wide to have 2 side by side. A bit odd when it’s a valid option in the codex. But not to worry, I’ll just stick with one on the model regardless.

I wanted it to be easy to swap over, and ideally for the storm bolter to be able to pivot round. This was done pretty easily by just sticking the magnet in the middle. A piece of plasticard on the underside of the hole in the hull holds a 4mm magnet.

Then the bottom of the flat panel has a nice little cross that’s just the right size to ram a magnet into. I just needed to trim off a bit of protruding plastic as it was hitting the plasticard.

Pro tip: 2mm magnets are damned fiddly. It’s really hard to hold one – even harder to hold it and keep it the right way up and apply glue. So I use a stack – about 10 or so – so I can put glue on the bottom one and put it in place by holding the stack. I just leave the stack there until the glue has dried, then pop them off.

(I don’t know who I’m kidding with all this ‘Pro tip’ malarkey, I’m pretty much just making this up as I go, but hopefully someone will find it helpful!)

For the storm bolter I had to stick a piece of sprue into it, to get the magnet close enough to the one on the hull. But as they’re both a bit bigger (both 4mm) they don’t have to align perfectly to work. And the end result is that it spins perfectly!

The only thing I’ve found a little difficult is that the flat panel is quite sunken, which makes it hard to get out. I need to use an Xacto to pop it out, which is no doubt going to damage the paint once painted up.

With storm bolter:

Without:

The Pred comes with either heavy bolters or lascannons on the side sponsons. I’ll probably be running it with lascannons all the time, but it’s good to have options!

The side hatches that house the sponsons are already magnetised to allow them to be swapped with the Rhino doors, but the kit only comes with one pair of them, and one pair of the little nubbins that the gun fits to (that allows it to pivot). So there’s no choice for it, the gun halves need magnetising.

I’ve magnetised a bunch of stuff – this’ll be easy! 

The guns are in two halves and need to be tight enough to grip the nubbin, yet still allow movement. So I figured I’d stick a mag at the front, and one at the back, and that’ll do it.

But once I started looking at drilling holes for the magnets I saw that wouldn’t really cut it. If the tip of the barrel isn’t held together it’ll splay out, but it’s too small for a magnet on both sides. So I drilled smaller holes and just pinned them. But this didn’t have the grip it needed to hold tight on the nubbin.

Pro tip: When drilling through something thin (like the side of a gun) with a tiny drill bit (for a pin) either stop before drilling all the way through, or don’t support the back of what you’re drilling with your index finger! A 0.7mm drill bit slides through the flesh of a finger no problem!! On the plus side, that’s actually the worst modelling injury I’ve had in 25 years, which is pretty amazing [make that 30 years! 🙂 ].

So I ended up with a pin at the front and back to hold it together generally, then a magnet where I could fit one, to keep the two halves close together.

You can’t really see the pins that well here, but can see the holes for them, and the magnet.

Looking at these photos, I’ve just realised both magnets are on one side! That’s not right!


The magnets must be stronger than the glue, so I’ll have to re-stick them.

Overall, I’m not that pleased with these. It’s just a little too hard to swap them over and when on they don’t quite stay close up together like they would do if they were glued. But it was fun finding out!

I think that’s all on the Predator – about 25 magnets in total. Apart from the dodgy guns, I think it all went pretty well and is now nicely versatile [and has been for 4 years!]. This is the post I did after painting it.

Deathwing – Master and Champion

Today I’ve got both my Deathwing Master and Deathwing Champion.

Deathwing Master, Deathwing Champion

I fancy doing a little more with Deathwing Master Mallen (another one named from the story at the end of this post). I thought about some freehand on the cape, but haven’t got the right idea (or the confidence!!) just yet. I thought maybe I could freehand The Rock (the Dark Angels’ fortress monastery, not Dwayne Johnson!), but couldn’t find a decent image of it for reference. I’ve also toyed with the idea of a stylised Lion representing Lion El’Jonson. I might come back to it at some point…

Deathwing Master
Deathwing Master
Deathwing Master

And this is my Deathwing Champion – yet to receive a name. Maybe I’ll pick through the old Deathwing novel by Bryan Ansell and Bill King from 1990.

Deathwing Champion
Deathwing Champion

Deathwing – Interrogator-Chaplain

This guy is Interrogator-Chaplain Brehgen, the latest addition to my Deathwing army. Hopefully he’ll hang out with my Deathwing Knights and give them a bit of a buff!

Deathwing Interrogator-Chaplain

Like Eisenhorn in my last post, this model is resin. Eisenhorn was my first resin model and I didn’t clean it up well enough and only realised when I got to painting him. Unfortunately, I didn’t learn from that experience before doing this guy, because I cleaned them up and undercoated them at the same time. But actually, I think it’s turned out okay. There are only a few bits of rogue resin left hanging around, and you’d need to know to look for it.

The Rogue Trader / 1st ed Warhammer 40k Compendium had a bunch of stuff about terminators in, back in the day. Including the short story I included in my first Deathwing post. It’s from this story that I named not only that first Deathwing unit, but also Chaplain Breghen. Take a look at the story and you’ll figure out what my Deathwing Master will be called!

(The photos seem to be a little washed out, I think because of the time of day I took the photos – even though I use a lightbox!)

Deathwing Interrogator-Chaplain